The purpose of this article is to provide an overview of the color infrared photography techniques available and achievable with a digital camera. It is not intended to be a comprehensive technical bible on the subject, but rather to lay the groundwork for anyone interested in the topic, offering a tangible experimental foundation to achieve satisfying results.
Fundamentals
Infrared photography, often used to produce unreal-looking black and white images, can also be used for its very particular interpretation of color, the result of a striking effect sometimes called “False Colors Infrared.”
The entire subtlety of color infrared work lies in blending visible light with so-called “invisible” light (we will use this term to define the infrared wavelengths that the sensor perceives but the human eye does not).
By effectively balancing these two types of light, it becomes possible to create images with very specific and surprising colors, giving natural landscapes a unique and distinctive quality.
If the concept sounds unfamiliar, you have likely already encountered it: Kodak Aerochrome, a film initially designed for the military to distinguish between real foliage and camouflage, was diverted from its original use for artistic photography purposes. The film was sensitive to both visible light and near-infrared, which explains the characteristic rendering of vegetation in shades of pink and red.
This film is no longer in production, but it has been widely used over the past several decades.
To name just two well-known works in the field: The Enclave, by Irish photographer Richard Mosse (who subsequently continued with a different infrared technology), and Oliver Stone’s film Alexander (2004), in which part of the battle scenes were shot by Rodrigo Prieto on Aerochrome to obtain these unreal, almost dreamlike landscapes.
Alexander, Oliver Stone (2004).
Theoretical foundations
What we call “light” is the portion of the electromagnetic spectrum that produces a visual sensation when perceived by the human eye. Wavelengths between 780 nanometers and 1 millimeter are called infrared waves*3 and are all located just above the visible portion of the electromagnetic spectrum. Among other wavelengths that the eye cannot perceive, we can cite ultraviolet rays and gamma rays as examples, both of which are located on the lower end of the spectrum (below 380 nm).
As a reminder, the visible spectrum ranges from approximately 390 to 710 nanometers*2. The transition between the visible spectrum and the infrared spectrum is not a sharp break—the longest red wavelengths of visible light become the shortest wavelengths of the infrared spectrum. Most luminous sources we already know produce infrared waves (the sun, fire, tungsten lighting…), which our eye does not perceive.
A digital sensor, by design, is capable of perceiving these wavelengths and interpreting them as digital imaging signals. Since the primary function of a real-world camera is to interpret light in a manner similar to the human eye, cameras are equipped with an IR filter (also called a “low-pass” filter), which prevents the sensor from perceiving these wavelengths.
IR filters are characterized by the value at which they block light transmission. For example, a 720 filter blocks values below 720 nanometers.
Shooting
To capture infrared, two technical elements are necessary: a camera whose anti-infrared filter has been removed, and a filter that will allow you to choose the proportion of visible light versus invisible light you wish to isolate. If you choose, for example, to use a 590 nanometer filter, you will capture wavelengths from 590 nm upward, meaning both the red end of the visible spectrum AND the infrared wavelengths. The lower the filter value, the more visible light you capture alongside the infrared. Conversely, a higher filter value (720 or above) lets in almost exclusively infrared light, producing an image much closer to a “pure” infrared monochrome.
In summary:
– A low-cutoff filter (e.g., 590 nm) = more visible light = more colors
– A high-cutoff filter (e.g., 720 nm) = more invisible light = more monochromatic
Processing
When looking at images straight out of the camera, the infrared rendering does not hold much interest. The images come out as red monochromes, with more or less nuance depending on the filtering. To achieve a more interesting result, several post-processing steps are necessary, but here we will focus on the two most crucial: the choice of color temperature, and channel inversion.
Practical examples
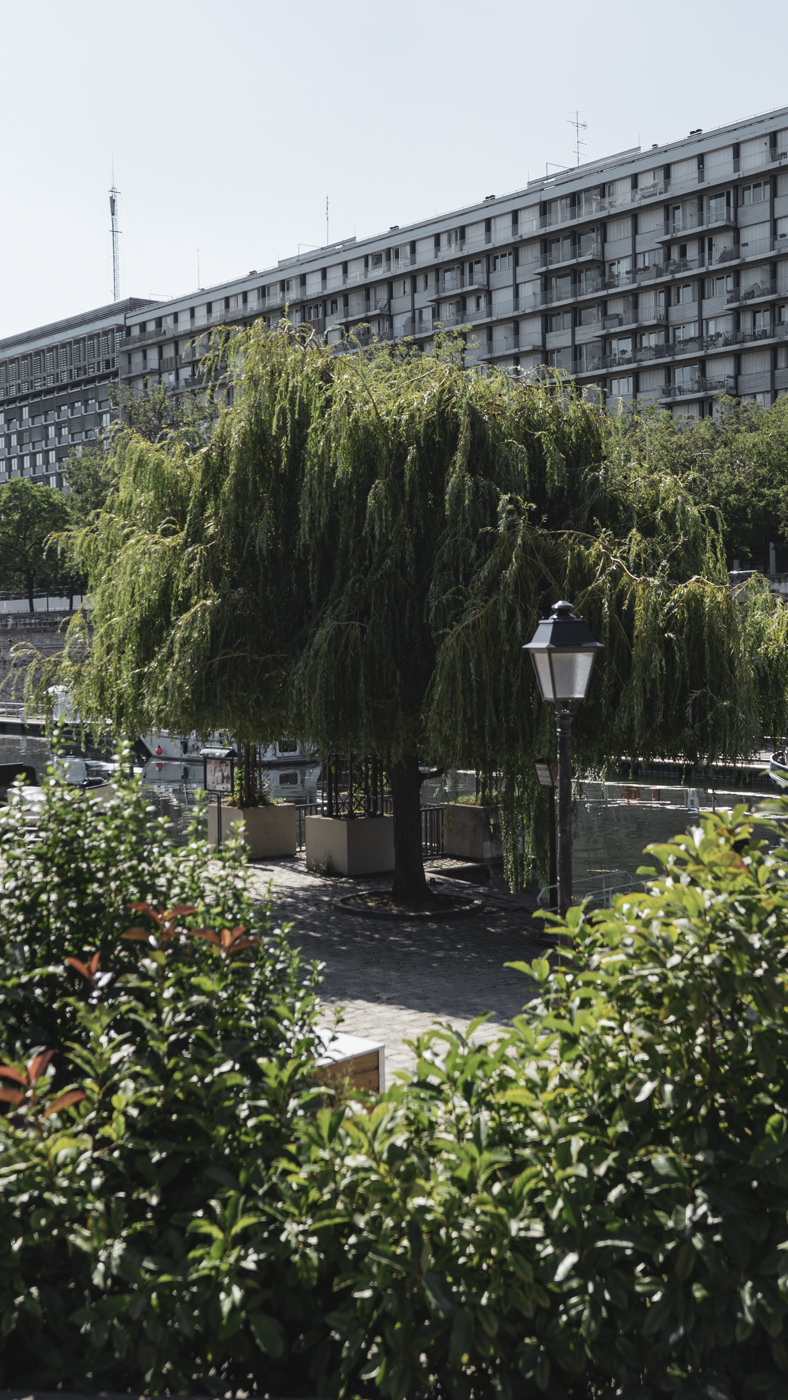
Here is an example of infrared photography, taken with a Canon 50D camera modified to perceive the full visible/infrared spectrum (this is called a Full Spectrum conversion). The same frame is first presented in “normal” capture (taken with another camera), then in “full spectrum” infrared (without any filtering), with a 590 nanometer filter, a 665 nanometer filter, and a 720 nanometer filter.
Reference frame, taken with an unmodified camera.
Photograph straight from the modified camera, with a “normal” color temperature (5600K).
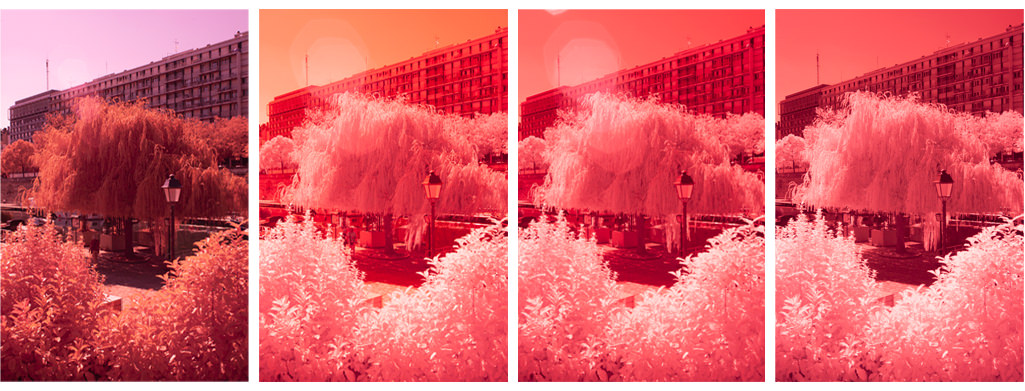
Full Spectrum / 590nm / 665nm / 720nm
The same photographs, with a first processing step (color temperature and hue adjusted for infrared):
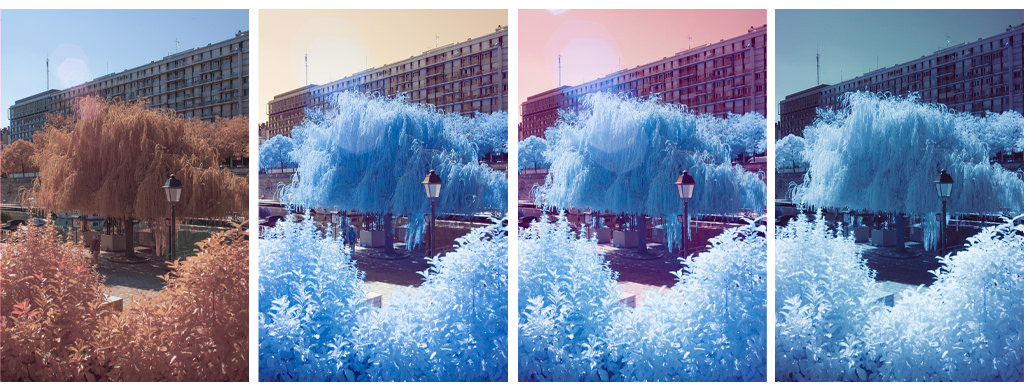
Full Spectrum / 590nm / 665nm / 720nm
Again the same images, with a second processing step—the inversion of the blue and red color channels (the operation is not performed on the full spectrum photo, which does not require additional processing since it contains more visible than invisible light):
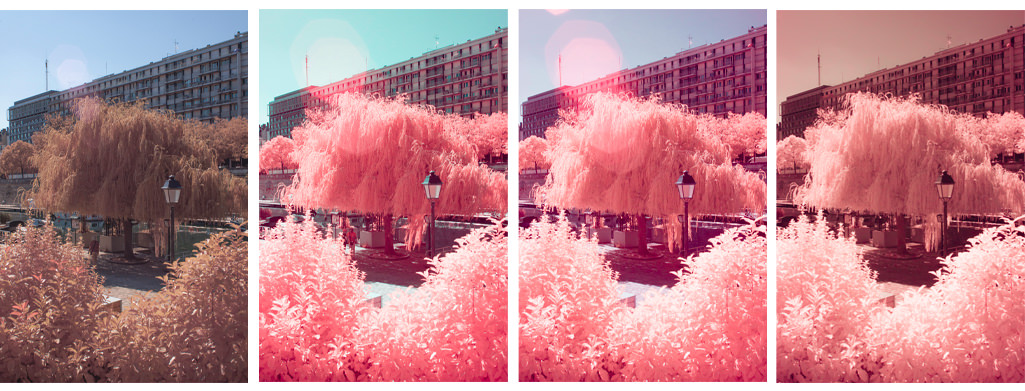
Full Spectrum / 590nm / 665nm / 720nm
In terms of colors, the final rendering is highly malleable and depends primarily on the first processing pass (adjusting color temperature and hue). The image can also be considered, after color channel inversion, as a “positive” that should then be color graded. You can also choose not to invert the colors, or to invert them differently. The options are vast, and each choice can profoundly alter the result. This is why experimentation is essential to find a precise rendering.
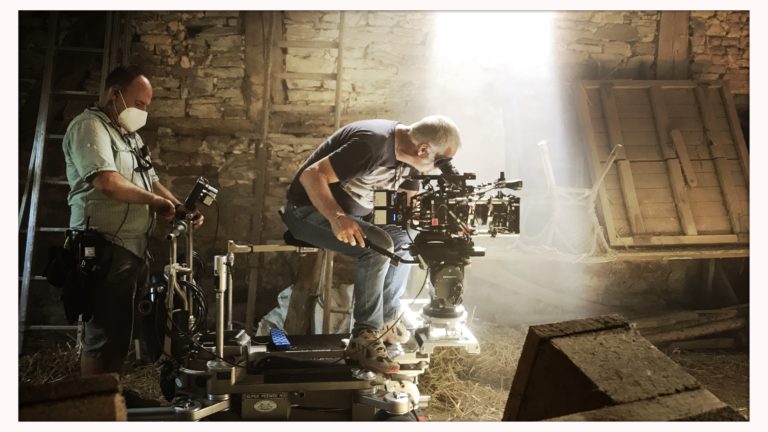
The techniques described here are demonstrated using a still camera for simplicity, but the same principles can be perfectly applied to video capture, provided the sensor has been modified, appropriate filters have been added, and the same processing logic has been applied.
To conclude, here are a few examples of photographs from my own infrared experiments.
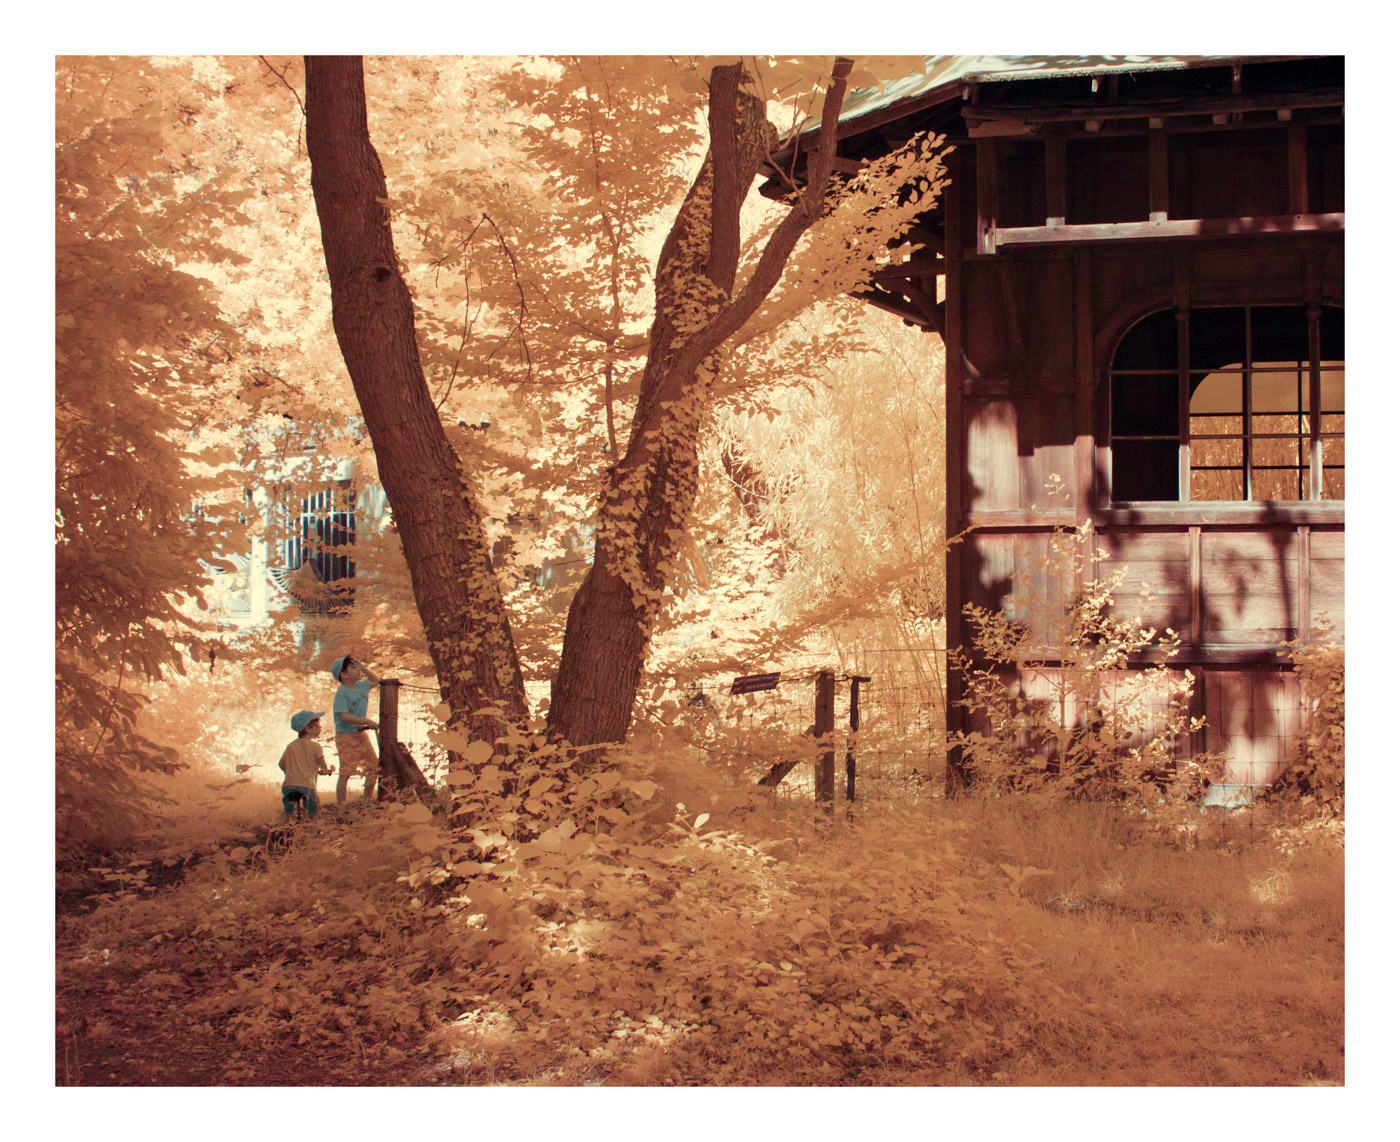
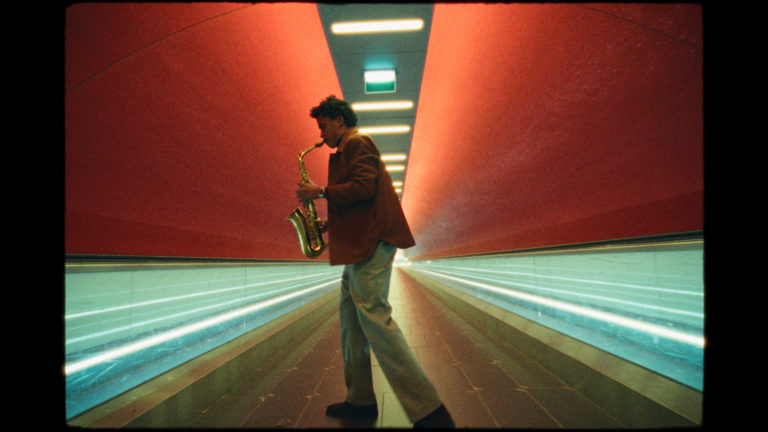
Taken with a 590 nanometer filter
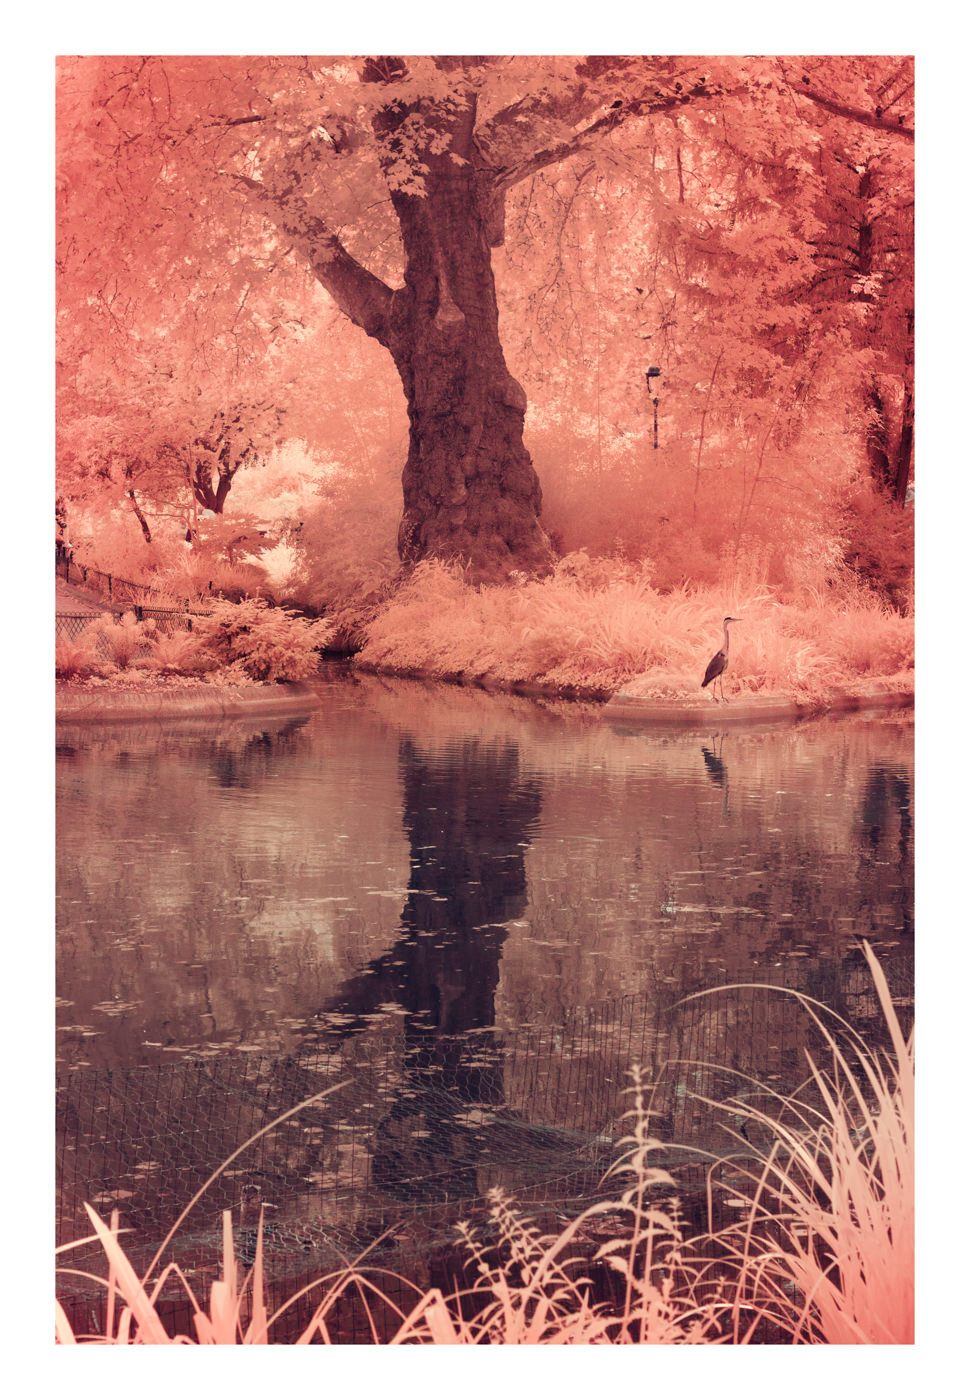
Taken with a 665 nanometer filter
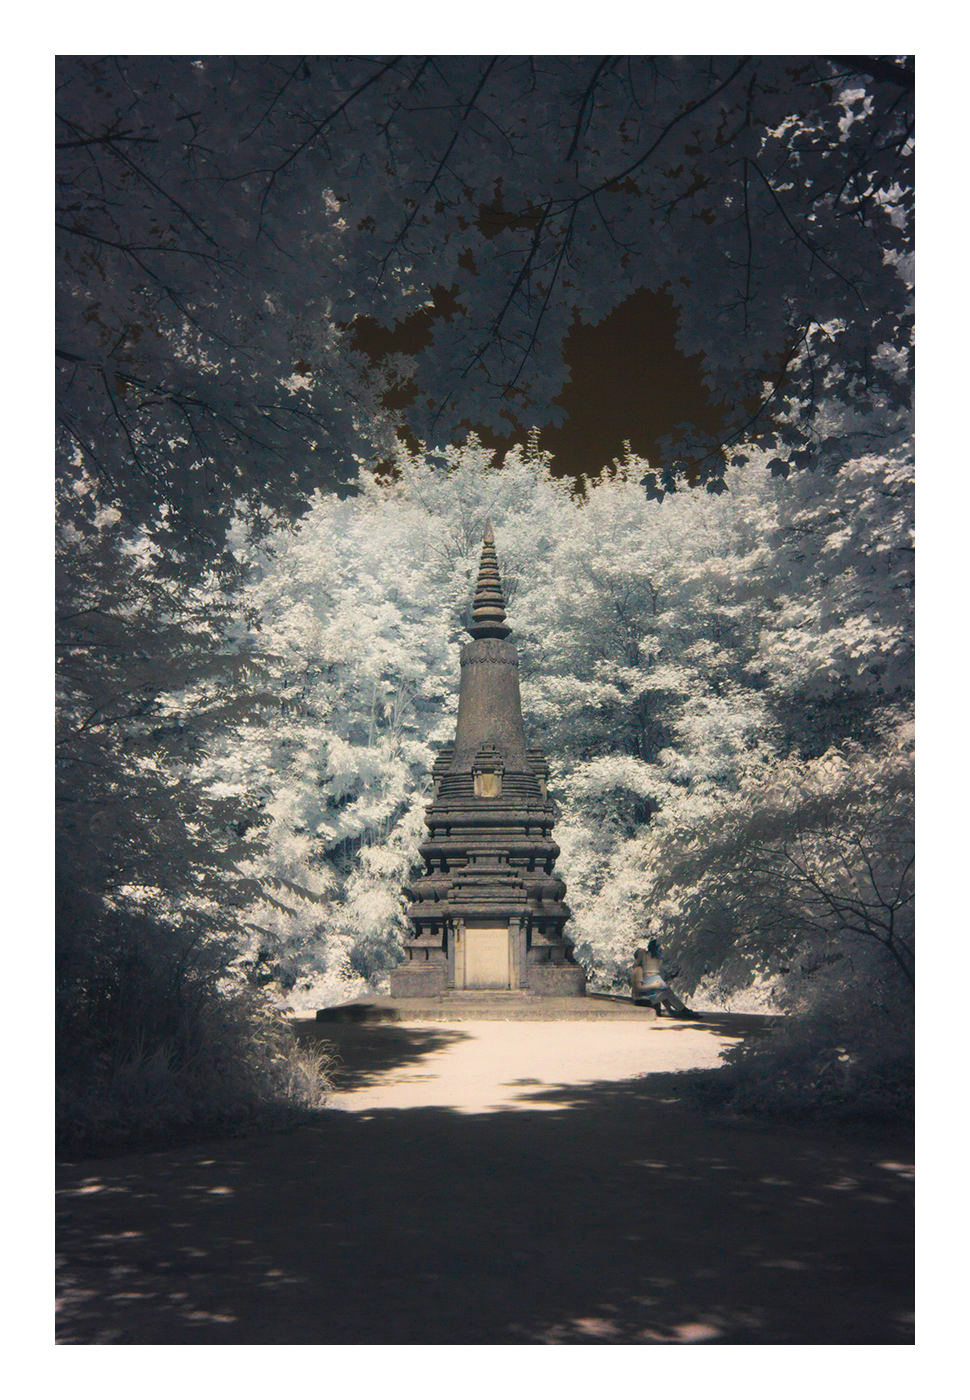
Taken with a 720 nanometer filter
*1 https://en.wikipedia.org/wiki/Infrared_photography
*2 https://en.wikipedia.org/wiki/Visible_spectrum
*3 https://en.wikipedia.org/wiki/Infrared