The aim of this article is to provide an overview of the infrared color photography techniques which are available and achievable with a digital camera. It is not intended to be a definitive technical guide on the subject, but to lay the groundwork, offering to those interested a tangible platform for experimentation that will allow them to achieve satisfactory results.
Fundamentals
Infrared photography, often used to produce surreal black and white images, can also be used for its unique interpretation of color, resulting in a striking effect sometimes called “False Color Infrared.” The subtlety of working with infrared color lies in the blending of visible light and so-called “invisible” light (we will use this term to define the infrared wavelengths that the sensor perceives but the human eye cannot). By effectively balancing these two types of light and applying optimized digital processing, a visually striking infrared image is obtained, which the cinematographer can then manipulate to serve an artistic purpose.
Color infrared photography in film
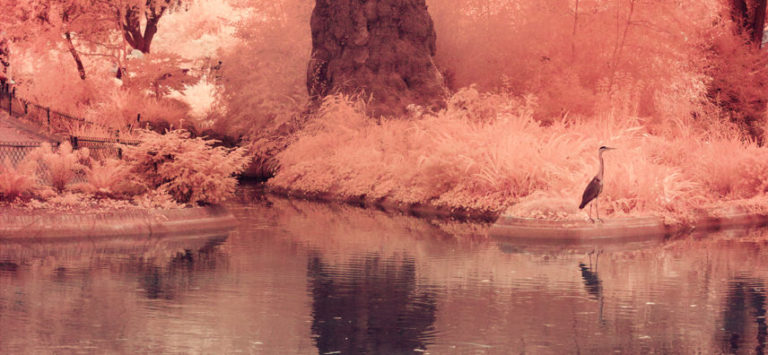
Black and white infrared photography has existed since the beginning of the last century. The Wood effect, named after its creator, photographer Robert W. Wood, renders vegetation as white as snow, and demonstrated the surreal potential of this visual effect as early as 1910.*1 It is probably the most famous rendering and the one that first comes to mind when discussing this photographic technique. The 1940s then saw the arrival of Kodak Ektachrome Infrared EIR film (better known and later sold as Aerochrome III). This film, designed for any application requiring a response to infrared light (medical, scientific, artistic, etc.), popularized the “false color” effect that we will learn to achieve digitally. The most notable photographer to have used this film for artistic purposes is Richard Mosse.


Photographs in Aerochrome III by Richard Mosse.
In cinema, let’s look at a sequence from Oliver Stone’s 2004 film Alexander, photographed by Rodrigo Prieto. During a battle against Indian warlords, Alexander the Great (Colin Farrell) is seriously wounded and then carried back to his tent by his generals as he teeters on the brink of death. The sequence beginning with the wound is filmed in Aerochrome III, giving it a magnificent and eerie effect, as if the entire jungle were stained with blood. Using infrared colors to depict a character on the edge of life and death is a striking example of the semiological applications of this technique.
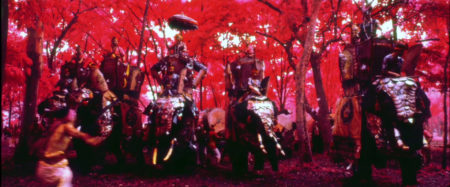
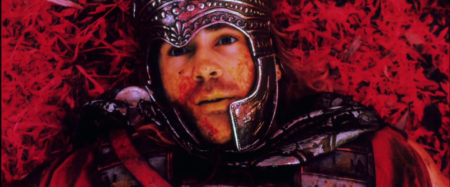
Alexander, Oliver Stone (2004).
Review of the theoretical foundations
What we call “light” is the part of the electromagnetic spectrum that produces a visual sensation when perceived by the human eye. Wavelengths between 780 nanometers and 1 millimeter are called infrared waves [3] and they are all located just above the visible part of the electromagnetic spectrum. Other wavelengths that the eye cannot perceive include ultraviolet and gamma rays, both of which are located in the weakest part of the spectrum (below 380 nm). As a reminder, the visible spectrum is located between approximately 390 nanometers and 710 nanometers [2]. The transition between the visible and infrared spectra is not a sharp break; the reddest wavelengths of visible light become the shortest wavelengths of the infrared spectrum. Most light sources we already know produce infrared waves (the sun, fire, tungsten lights, etc.), which our eyes cannot perceive. A digital sensor, by design, is capable of detecting these wavelengths and interpreting them as a digital signal. Since the primary function of a live-action camera is to interpret light in a way similar to the human eye, cameras are equipped with an IR filter (also called a low-pass filter) that prevents the sensor from detecting these wavelengths. IR filters are characterized by the value at which they block light transmission. For example, a 720 filter blocks values below 720 nanometers.
Filming
To capture infrared light, two technical elements are necessary: a camera with removed infrared filter, as well as and a filter that allows you to choose the proportion of visible to invisible light you want to isolate. If you choose, for example, to use the entire visible spectrum, infrared light will become very marginal and have a reduced influence. In opposite, if you use a “deep-IR” filter, the image will consist of 100% invisible light. This filter choice is then crucial, since the balance between the two spectra is decisive in the final image. The remaining choices are made during processing.
Treatment
If we simply accept the camera’s native output, infrared photography isn’t particularly interesting. The images come out as red monochromes, with varying degrees of nuance depending on the filtering. To obtain a more compelling result, several post-processing steps are necessary, but here we’ll focus on the two most crucial: choosing the color temperature and inverting the channels.
Practical examples
Here is an example of an infrared photograph, taken with a Canon 50D camera modified to capture the entire visible/infrared spectrum (a process called full-spectrum conversion). The same frame is first shown in a “normal” shot (captured with another camera), then in “full-spectrum” infrared (without any filtering), with a 590-nanometer filter, a 665-nanometer filter, and a 720-nanometer filter.
A control frame, taken with an unmodified camera, is also shown. 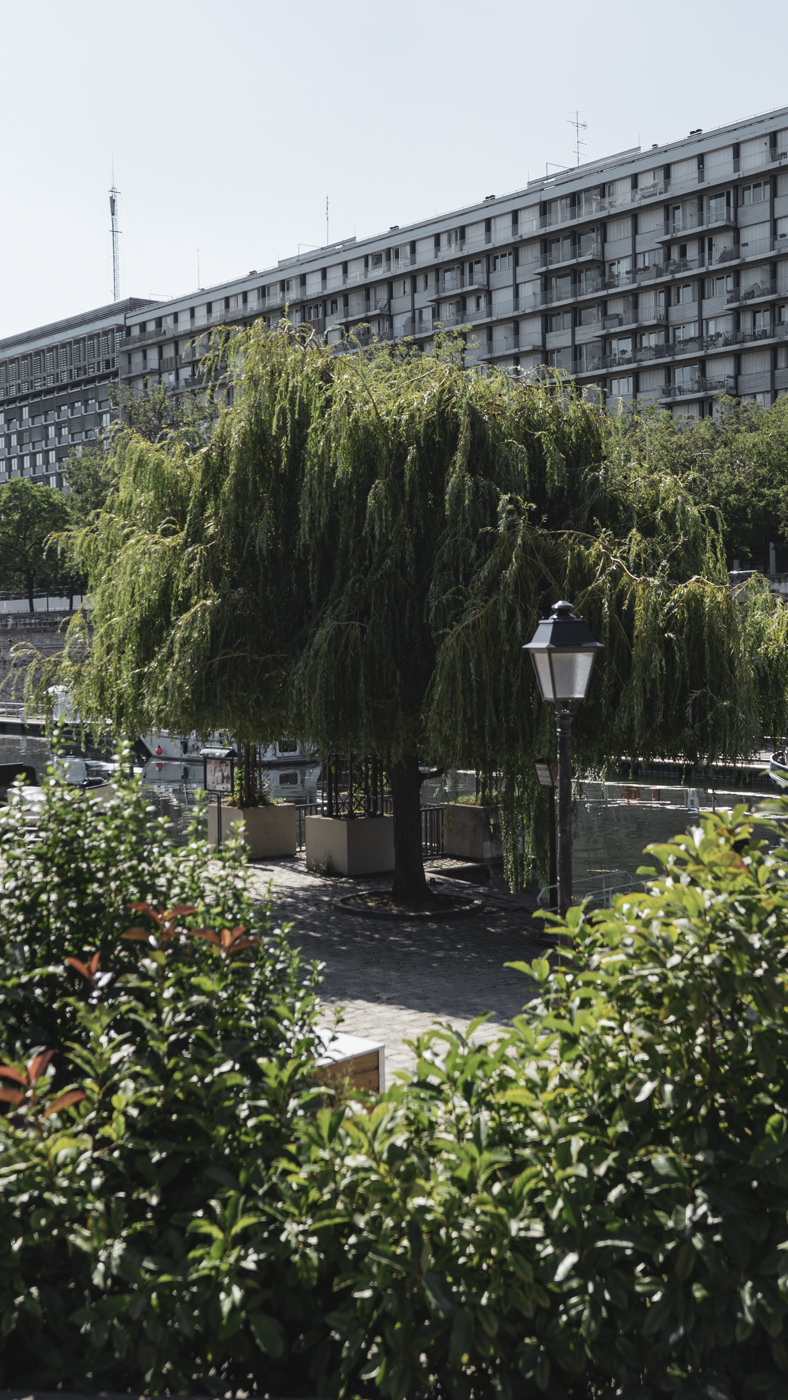 Photograph taken from the modified camera output, with a “normal” color temperature (5600K).
 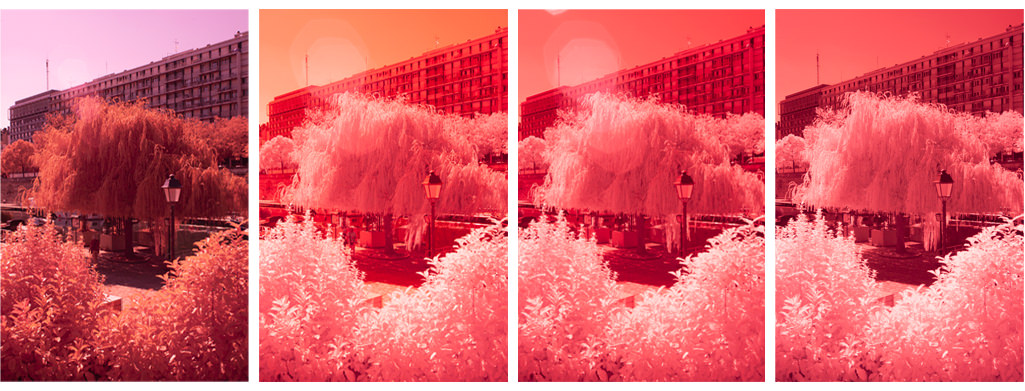 Full Spectrum /590nm / 665nm / 720nm
The same photographs, with an initial processing step (color temperature and tint adapted to infrared): 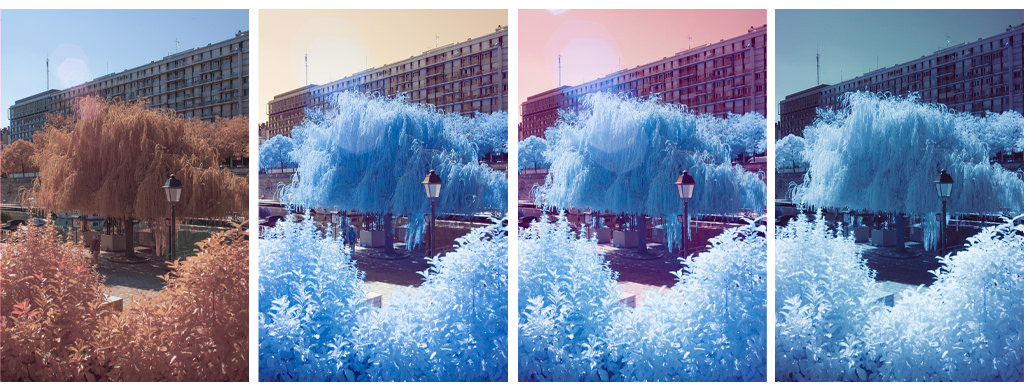 Full Spectrum /590nm / 665nm / 720nm Always the same images, with a second processing step – the inversion of the blue and red color channels (this operation is not performed on the full spectrum photo, which does not require additional processing, since it contains more visible than invisible light):
 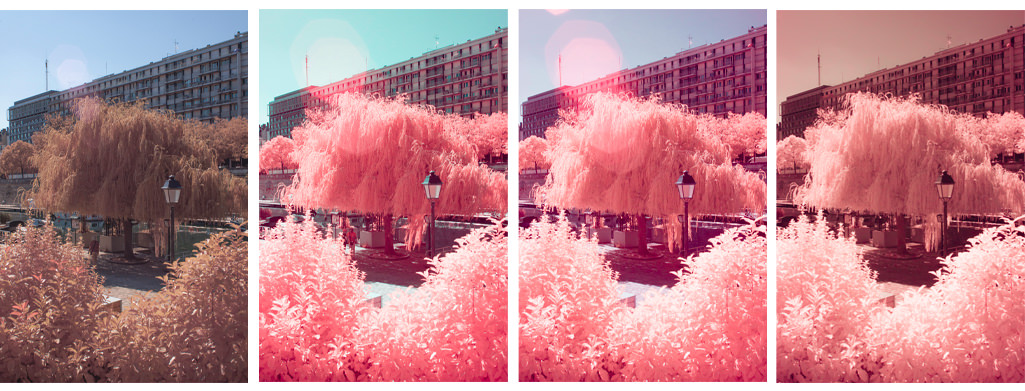 Full Spectrum / 590nm / 665nm / 720nm.
In terms of color, the final rendering is very malleable and depends primarily on the first processing pass (adapting the color temperature and hue). After inverting the color channels, the image can also be considered a “positive” that then needs to be calibrated. One can also choose not to invert the colors, or to invert them differently. The choices are vast, and each one can profoundly alter the result. This is why experimentation is necessary to find a precise rendering. The techniques described here are illustrated using a camera for simplicity, but the same principles can be perfectly applied to video shooting, provided the sensor has been adapted, appropriate filters have been added, and the same processing logic is applied. In conclusion, here are some examples of photographs from my own infrared experiments. 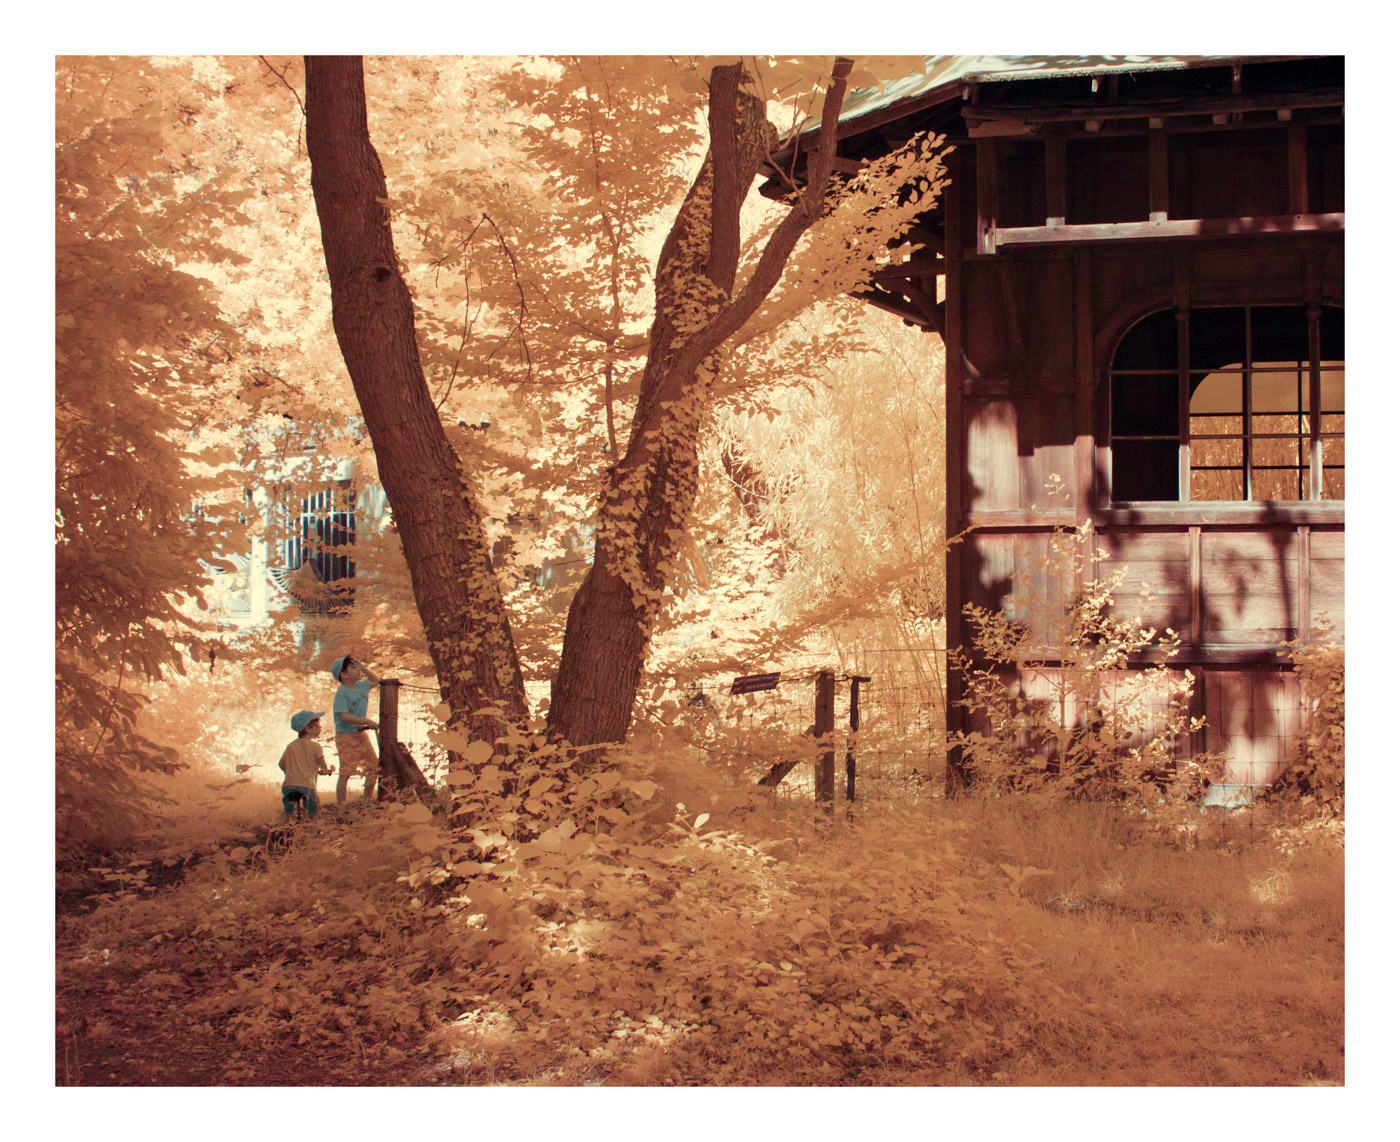 Shot with a 590 nanometer filter
 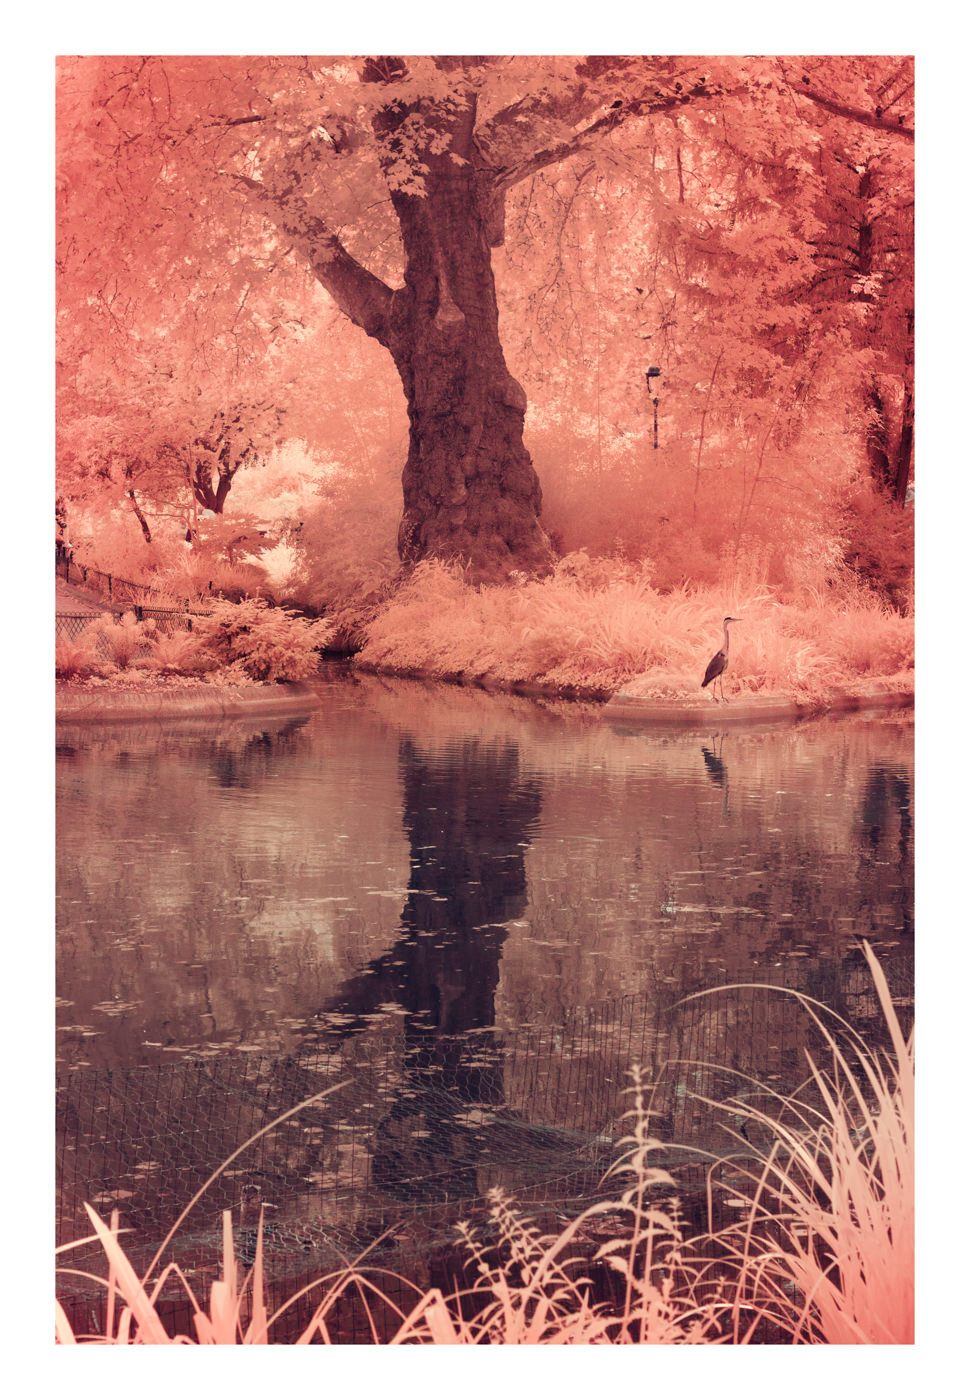 Shot with a 665 nanometer filter
 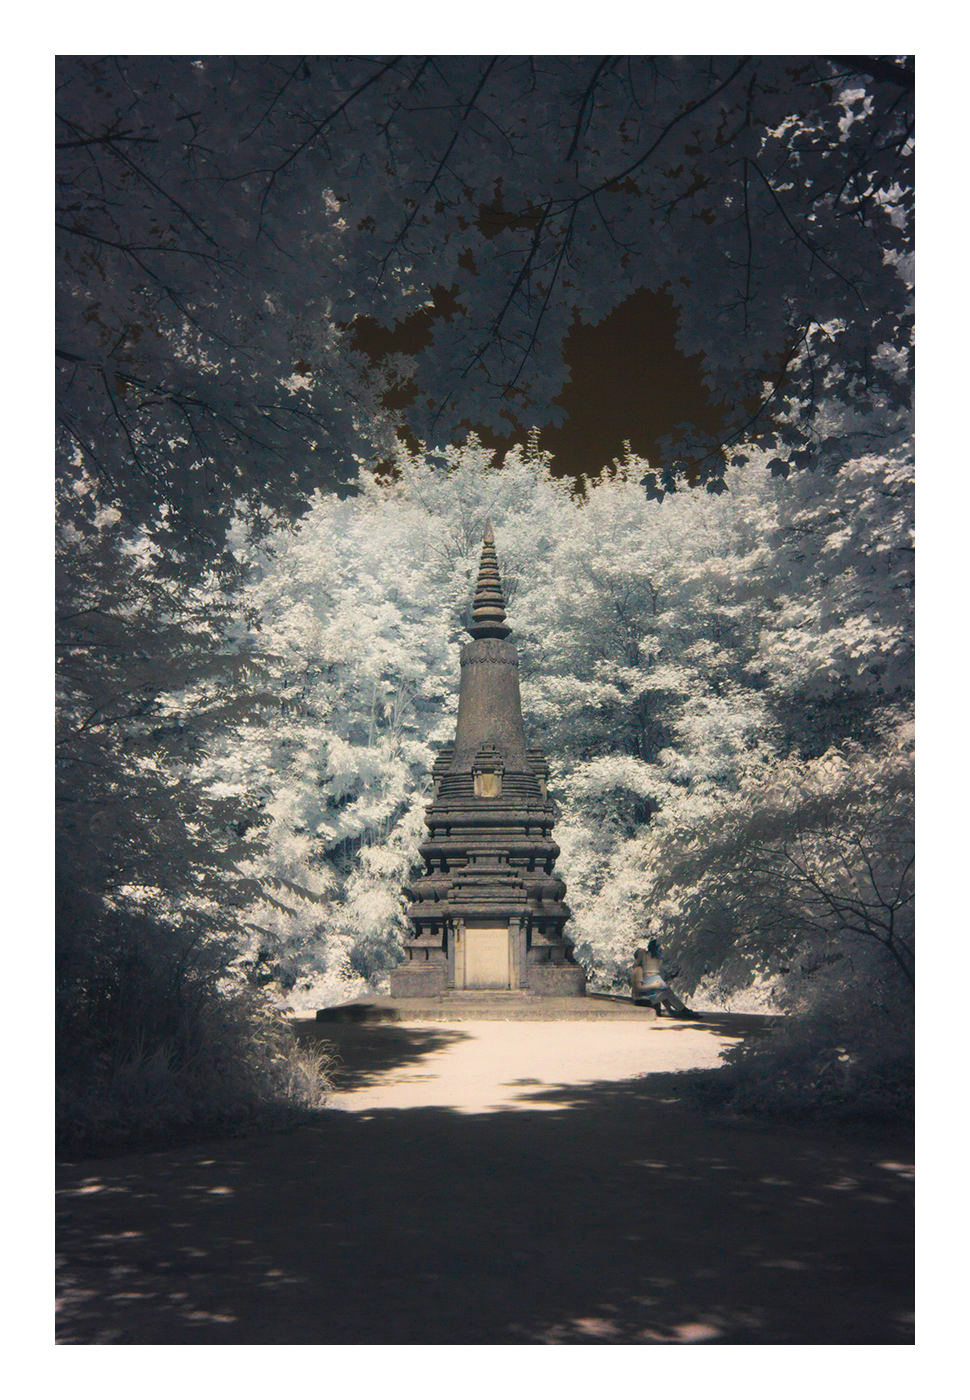 Shot with a 720 nanometer filter
- [1] https://en.wikipedia.org/wiki/Infrared_photography
- [2] https://fr.wikipedia.org/wiki/Spectre_visible
- [3] https://fr.wikipedia.org/wiki/Infrarouge